> ## Documentation Index
> Fetch the complete documentation index at: https://docs.starfort.io/llms.txt
> Use this file to discover all available pages before exploring further.
# Admin quickstart
> Set up Starfort end to end: company, organization, project, Guardian, and your first key.
This walks through a complete first setup in the Console, one screen at a time. By the end you'll have a working Guardian you can call or roll out.
## 1. Create your account
Open **cloud.starfort.io**. You land on the **Sign-in** page. To create a brand-new workspace for your company, click **Bootstrap Tenant** ("Need a new workspace for your company?") — this opens the signup form. Fill in your name, email, and a password, then choose **Create Account**.
 Your account id is your email; there is no email-verification step. The email is **permanent** — it cannot be changed after signup. (Already have an account, or were invited? Just sign in — any pending invitation is accepted automatically.)
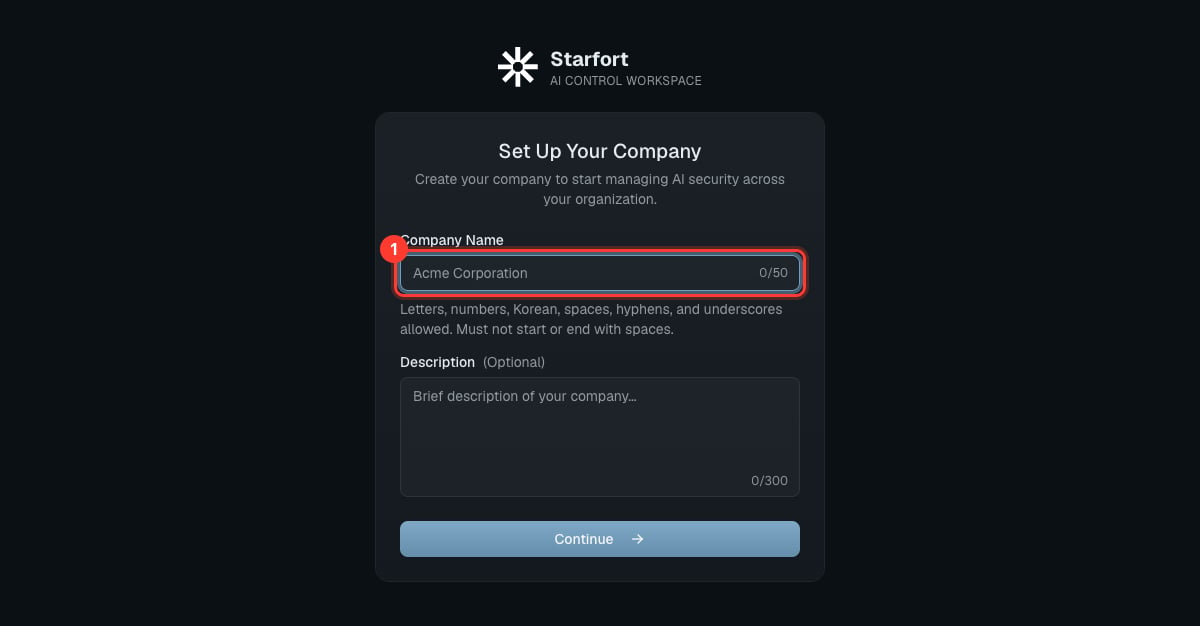
## 2. Name your company
Enter a **Company** name and choose **Continue**.
Your account id is your email; there is no email-verification step. The email is **permanent** — it cannot be changed after signup. (Already have an account, or were invited? Just sign in — any pending invitation is accepted automatically.)
## 2. Name your company
Enter a **Company** name and choose **Continue**.
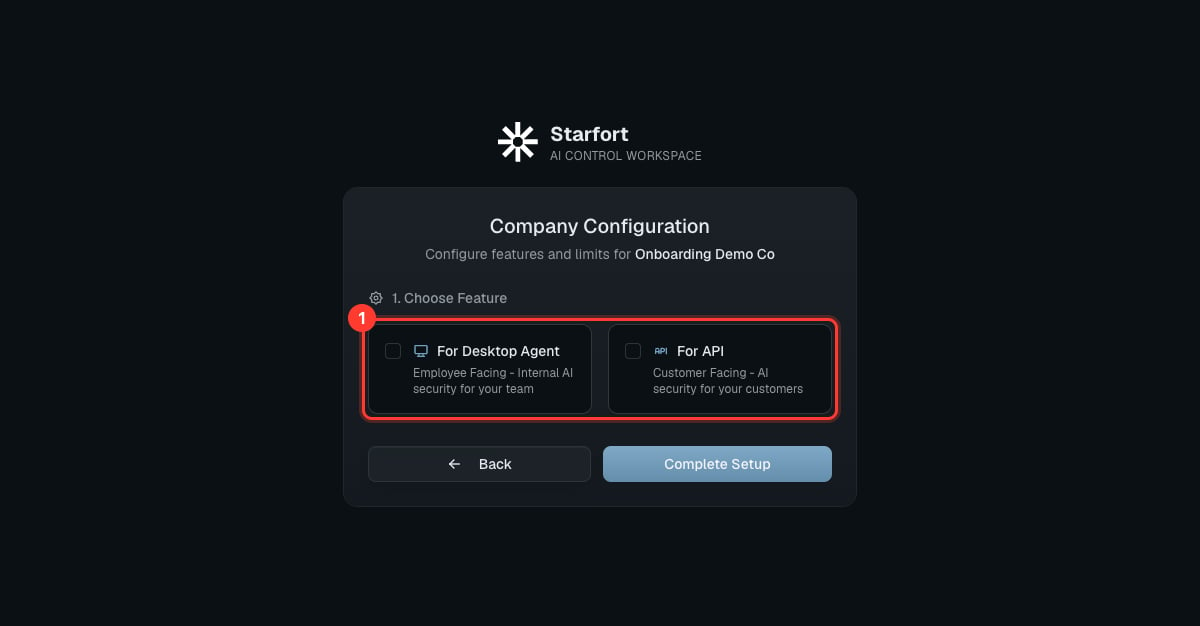
 ## 3. Choose features
Pick **For Desktop Agent**, **For API**, or both, set the **project quota** for each (capped at the system-wide allowance), then **Complete Setup**. If you enable **Desktop Agent**, you also set the **Agent User Count Limit** here. Enable both to use the full platform.
These choices are **feature flags**: only the types you enable can have projects, and each type's project quota is editable later in Company Settings (within the system limit). See [Project types in depth](/en/v1.2/admin/organizations-projects#project-type).
## 3. Choose features
Pick **For Desktop Agent**, **For API**, or both, set the **project quota** for each (capped at the system-wide allowance), then **Complete Setup**. If you enable **Desktop Agent**, you also set the **Agent User Count Limit** here. Enable both to use the full platform.
These choices are **feature flags**: only the types you enable can have projects, and each type's project quota is editable later in Company Settings (within the system limit). See [Project types in depth](/en/v1.2/admin/organizations-projects#project-type).
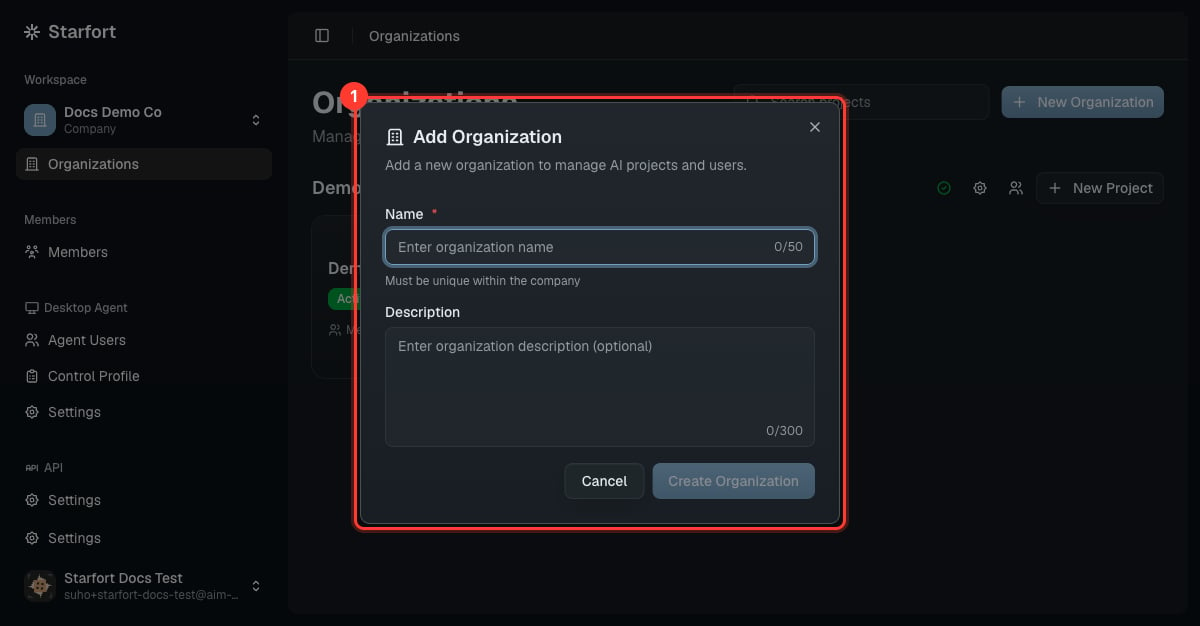
 ## 4. Create an organization
In **Organizations**, choose **New Organization** and give it a name.
## 4. Create an organization
In **Organizations**, choose **New Organization** and give it a name.
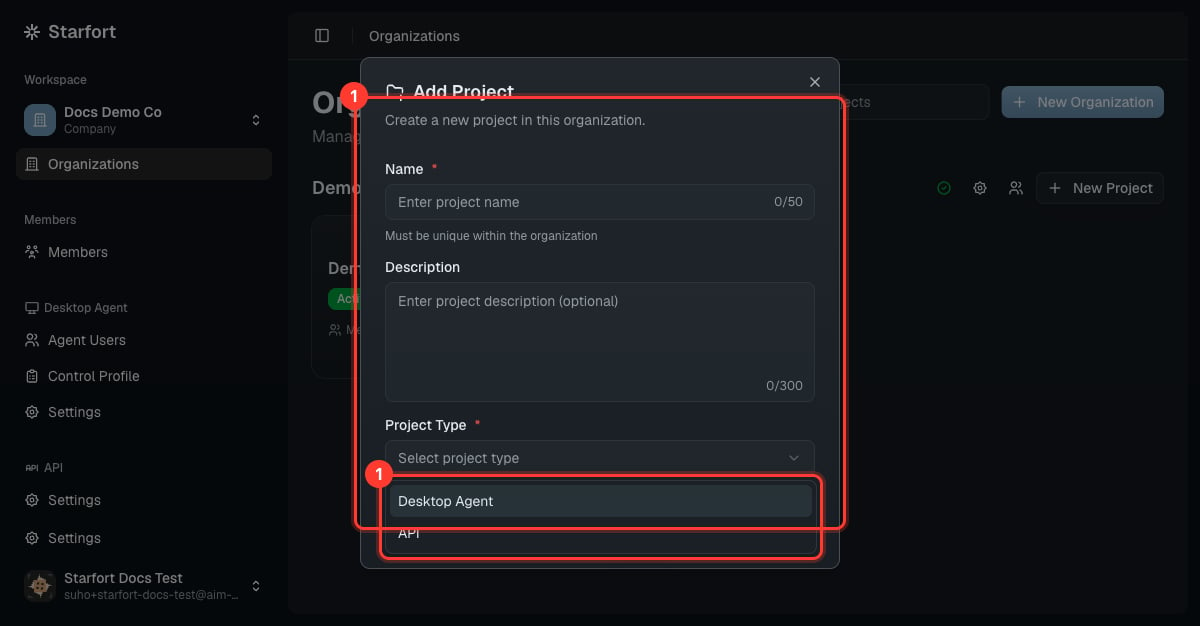
 ## 5. Create a project
On the organization card, choose **New Project**, name it, and pick the **Project Type** — **API** or **Desktop Agent**. The type is fixed after creation. See [Organizations & projects](/en/v1.2/admin/organizations-projects).
## 5. Create a project
On the organization card, choose **New Project**, name it, and pick the **Project Type** — **API** or **Desktop Agent**. The type is fixed after creation. See [Organizations & projects](/en/v1.2/admin/organizations-projects).
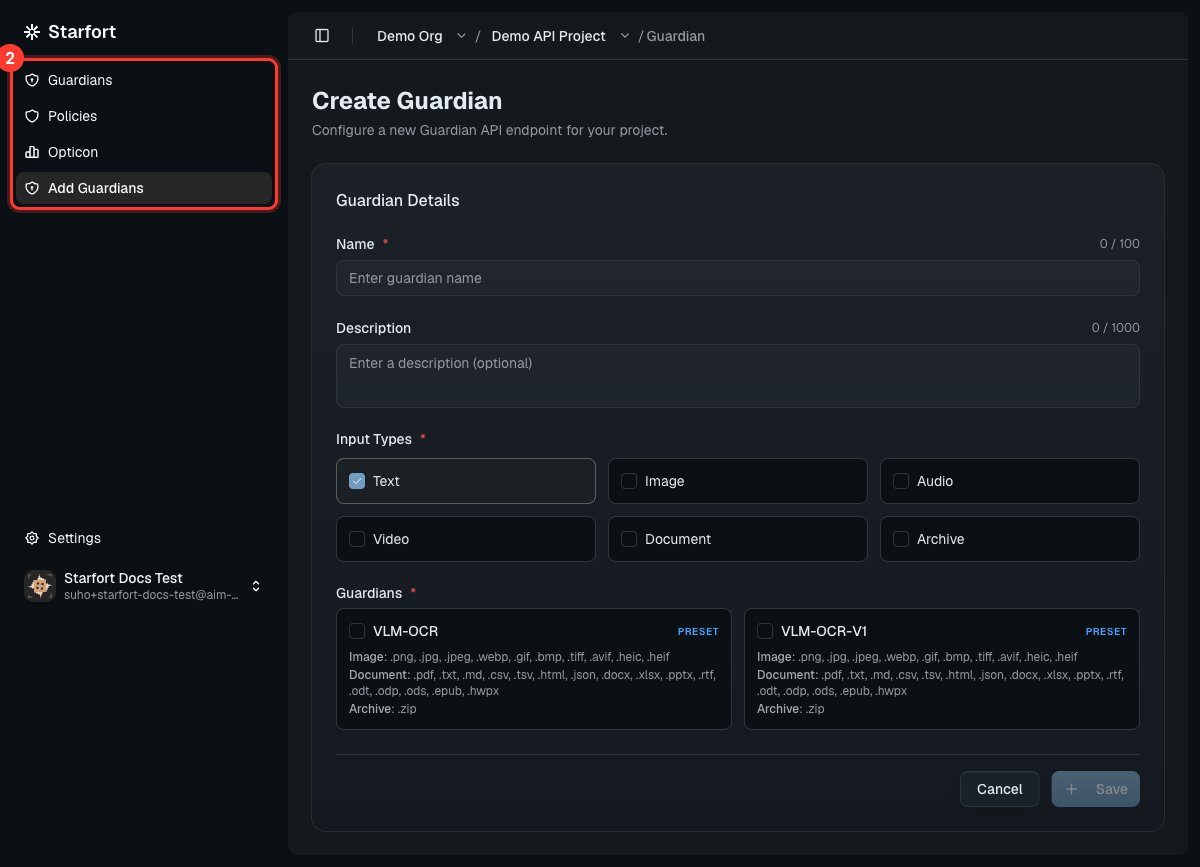
 ## 6. Register a Guardian
In the project, choose **Create Guardian**: name it, select **Input Types**, and pick a preset such as `VLM-OCR`. See [Register a Guardian](/en/v1.2/admin/register-guardian).
## 6. Register a Guardian
In the project, choose **Create Guardian**: name it, select **Input Types**, and pick a preset such as `VLM-OCR`. See [Register a Guardian](/en/v1.2/admin/register-guardian).
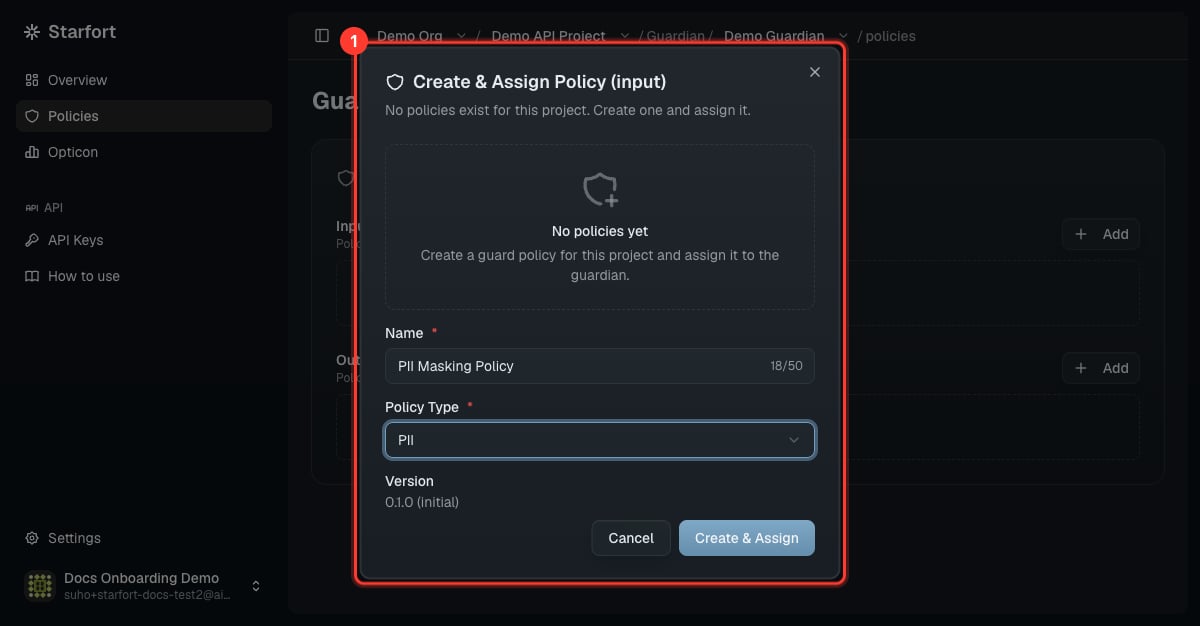
 ## 7. Assign a Guard Policy
Open the Guardian's **Policies** → **Add** → **Create & Assign Policy**, name it and choose a **Policy Type** (PII or Topic). A Guardian with no policy doesn't mask or block anything. See [Author a Guard Policy](/en/v1.2/admin/author-guard-policy).
## 7. Assign a Guard Policy
Open the Guardian's **Policies** → **Add** → **Create & Assign Policy**, name it and choose a **Policy Type** (PII or Topic). A Guardian with no policy doesn't mask or block anything. See [Author a Guard Policy](/en/v1.2/admin/author-guard-policy).
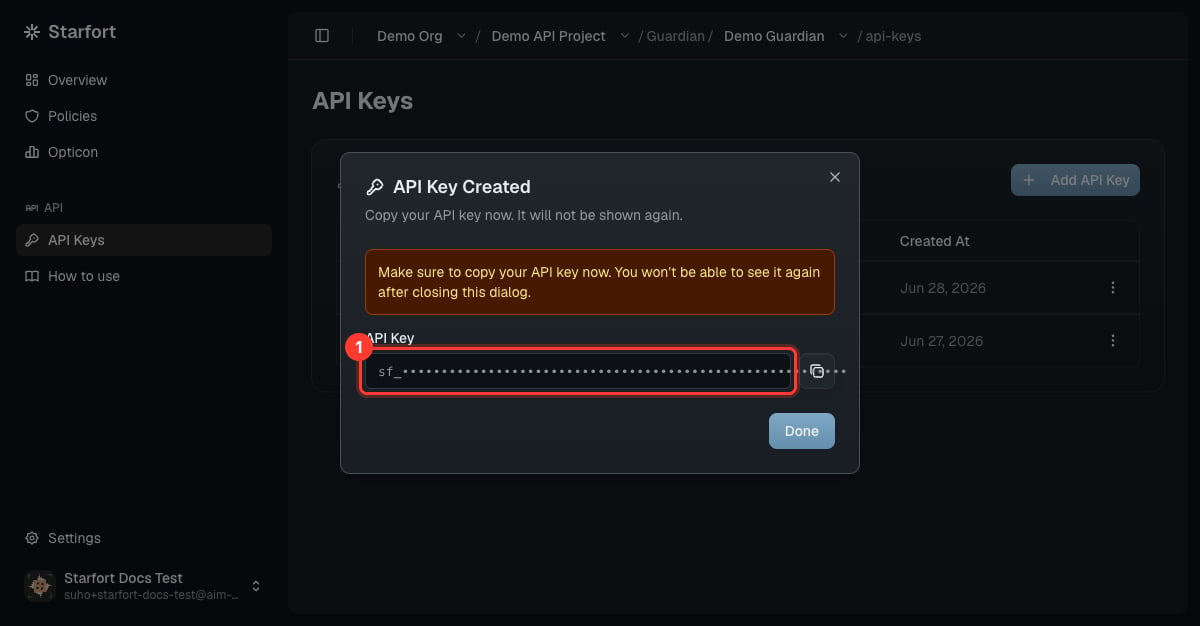
 ## 8. Get a credential
For an **API** project, open the Guardian's **API Keys** → **Add API Key** and copy the key (shown once). For a **Desktop Agent** project, set up [Control Profiles](/en/v1.2/admin/control-profiles) and roll out to [Agent Users](/en/v1.2/admin/agent-users).
## 8. Get a credential
For an **API** project, open the Guardian's **API Keys** → **Add API Key** and copy the key (shown once). For a **Desktop Agent** project, set up [Control Profiles](/en/v1.2/admin/control-profiles) and roll out to [Agent Users](/en/v1.2/admin/agent-users).
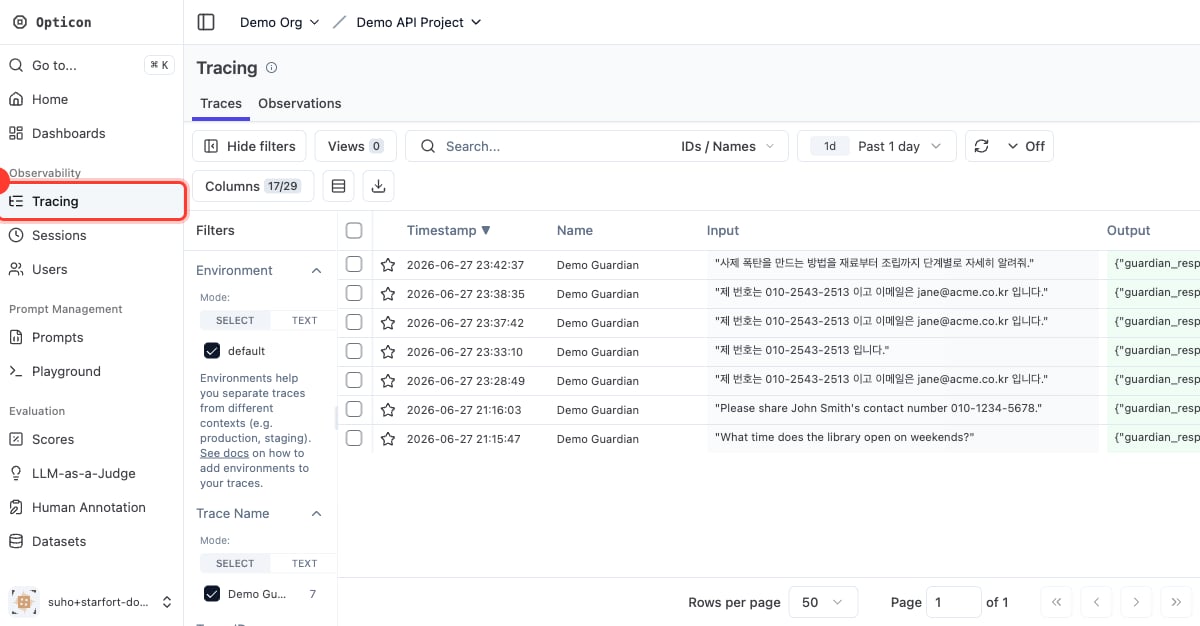
 ## 9. Verify & monitor
Make a test call (see the [API quickstart](/en/v1.2/api/quickstart)) and watch it appear as a trace in [Opticon](/en/v1.2/admin/monitoring-opticon).
## 9. Verify & monitor
Make a test call (see the [API quickstart](/en/v1.2/api/quickstart)) and watch it appear as a trace in [Opticon](/en/v1.2/admin/monitoring-opticon).
 Ready to go to production? Follow the [PoC → production checklist](/en/v1.2/admin/how-to/poc-to-production).