> ## Documentation Index
> Fetch the complete documentation index at: https://docs.starfort.io/llms.txt
> Use this file to discover all available pages before exploring further.
# 맞춤형 Control Profile 추가 방법
> Desktop Agent에 어떤 AI 서비스를 어떻게 관리할지 알려주는 Control Profile을 생성합니다.
[Control Profile](/ko/v1.2/admin/control-profiles)은 Desktop Agent를 위한 AI 서비스를 정의합니다. 이 레시피는 Control Profile을 처음부터 생성합니다.
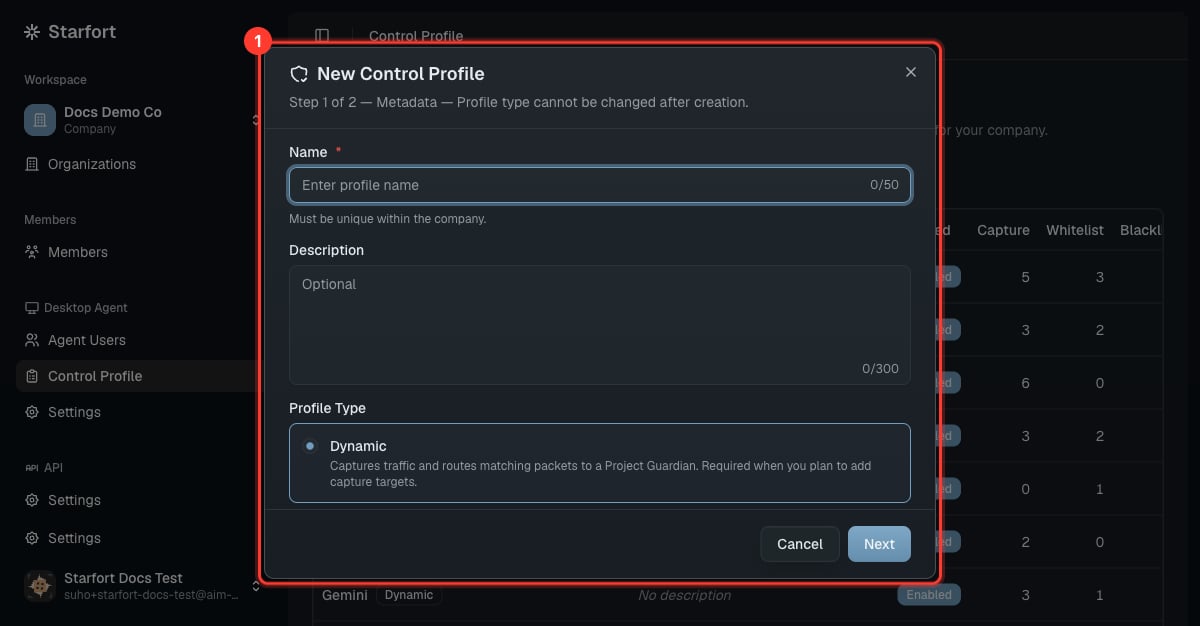
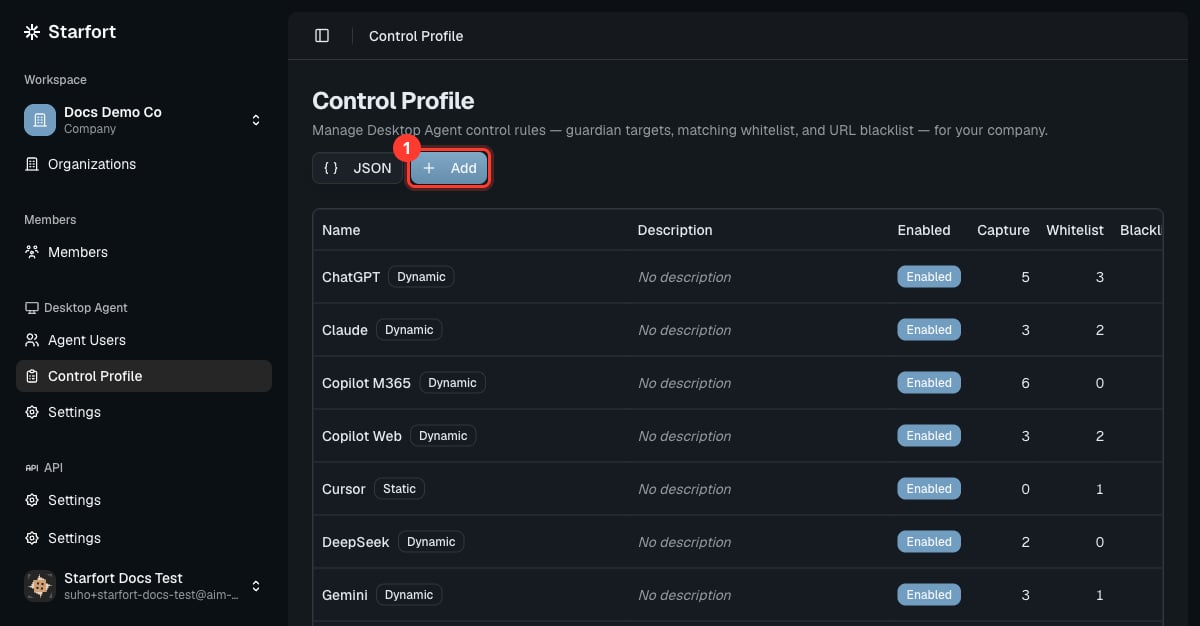
## 1. 프로필 생성
**Desktop Agent › Control Profile**을 열고 → **Add**를 선택합니다. 이름(예: AI 서비스 이름)과 설명을 입력합니다.
 ## 2. 세 가지 메커니즘 정의
| 메커니즘 | 입력 내용 | 효과 |
| ------------------------ | -------------- | ------------------------------ |
| **Guardian targets**(캡처) | 서비스의 요청 URL/패턴 | Agent가 이를 가로채 Guardian으로 전송합니다 |
| **Matching whitelist** | 항상 허용할 요청 | 건너뛰어집니다(그대로 통과) |
| **URL blacklist** | 즉시 차단할 URL | 평가 없이 차단됩니다 |
* 프로필을 **Dynamic**(Guardian으로 평가 가능)으로 만들려면 최소 하나의 **Guardian target**을 추가하세요.
* whitelist/blacklist만 있고 target이 없으면 프로필은 **Static**(필터만 적용, Guardian 호출 없음)입니다.
이 Static/Dynamic 타입은 **생성 시 고정되며** 나중에 변경할 수 없습니다 — 전환이 필요하면 새 프로필을 생성하세요. 각 항목의 `id`는 해당 메커니즘 내에서 고유해야 합니다(편집기가 저장 시 검증). Guardian-target 항목은 `checkOutput`, `unmaskOutput`, `opticonLoggingEnabled`, `userNotificationEnabled` 같은 타겟별 옵션도 포함합니다 — [용어집](/ko/v1.2/concepts/glossary)의 규칙 스키마를 참고하세요.
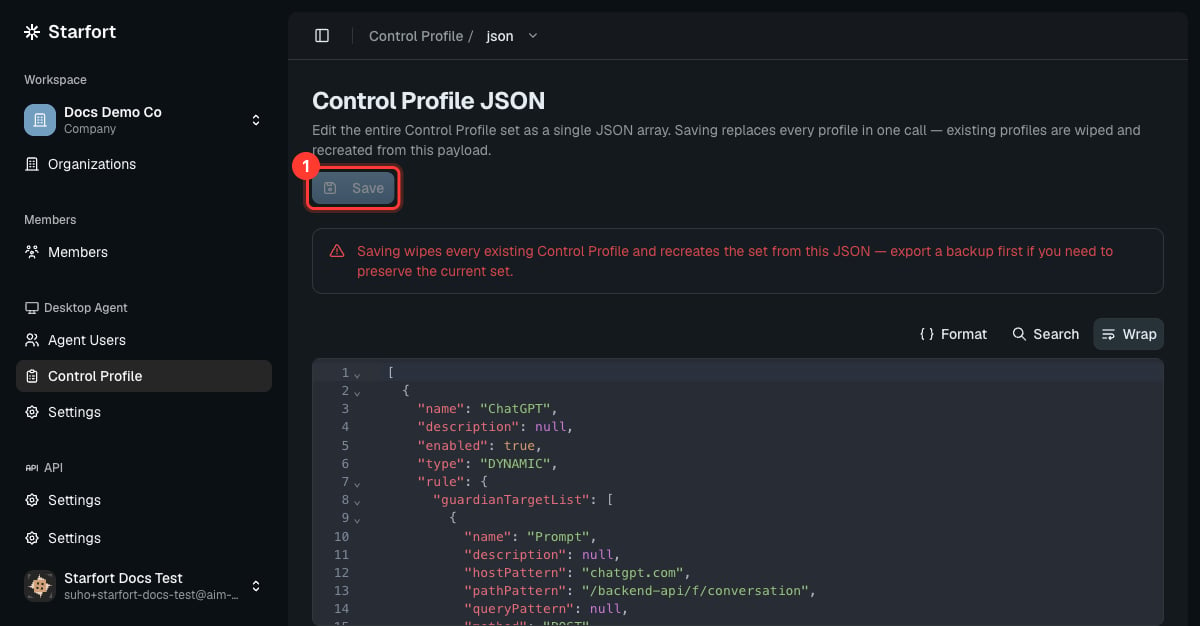
**JSON** 보기를 사용하면 세 가지 메커니즘을 모두 정밀하게 편집할 수 있습니다:
```json theme={null}
{
"guardianTargetList": [ { "hostPattern": "*.example-ai.com", "pathPattern": "/api/chat", "method": "POST" } ],
"matchingWhitelist": [ { "hostPattern": "*.example-ai.com", "pathPattern": "/health" } ],
"urlBlacklist": [ ]
}
```
## 2. 세 가지 메커니즘 정의
| 메커니즘 | 입력 내용 | 효과 |
| ------------------------ | -------------- | ------------------------------ |
| **Guardian targets**(캡처) | 서비스의 요청 URL/패턴 | Agent가 이를 가로채 Guardian으로 전송합니다 |
| **Matching whitelist** | 항상 허용할 요청 | 건너뛰어집니다(그대로 통과) |
| **URL blacklist** | 즉시 차단할 URL | 평가 없이 차단됩니다 |
* 프로필을 **Dynamic**(Guardian으로 평가 가능)으로 만들려면 최소 하나의 **Guardian target**을 추가하세요.
* whitelist/blacklist만 있고 target이 없으면 프로필은 **Static**(필터만 적용, Guardian 호출 없음)입니다.
이 Static/Dynamic 타입은 **생성 시 고정되며** 나중에 변경할 수 없습니다 — 전환이 필요하면 새 프로필을 생성하세요. 각 항목의 `id`는 해당 메커니즘 내에서 고유해야 합니다(편집기가 저장 시 검증). Guardian-target 항목은 `checkOutput`, `unmaskOutput`, `opticonLoggingEnabled`, `userNotificationEnabled` 같은 타겟별 옵션도 포함합니다 — [용어집](/ko/v1.2/concepts/glossary)의 규칙 스키마를 참고하세요.
**JSON** 보기를 사용하면 세 가지 메커니즘을 모두 정밀하게 편집할 수 있습니다:
```json theme={null}
{
"guardianTargetList": [ { "hostPattern": "*.example-ai.com", "pathPattern": "/api/chat", "method": "POST" } ],
"matchingWhitelist": [ { "hostPattern": "*.example-ai.com", "pathPattern": "/health" } ],
"urlBlacklist": [ ]
}
```
 ## 3. 활성화 및 범위 지정
프로필을 활성화하고, 이를 사용해야 하는 Desktop Agent 프로젝트에서 활성 상태인지 확인하세요. 할당된 [Agent User](/ko/v1.2/admin/agent-users)는 자동으로 이를 적용받으며, 이후 프로필을 편집하면 해당 프로필을 사용하는 모든 프로젝트와 Guardian에 **자동으로 전파됩니다** — 재할당 단계가 없습니다.
**Dynamic** 프로필은 **Project Guardian에 매핑된** 후에야 실제로 Guardian을 호출합니다([Guardian 등록](/ko/v1.2/admin/register-guardian) 시 또는 설정에서 수행). 그 전까지는 Guardian targets가 Opticon에 기록되기만 하고 평가되지는 않습니다.
## 3. 활성화 및 범위 지정
프로필을 활성화하고, 이를 사용해야 하는 Desktop Agent 프로젝트에서 활성 상태인지 확인하세요. 할당된 [Agent User](/ko/v1.2/admin/agent-users)는 자동으로 이를 적용받으며, 이후 프로필을 편집하면 해당 프로필을 사용하는 모든 프로젝트와 Guardian에 **자동으로 전파됩니다** — 재할당 단계가 없습니다.
**Dynamic** 프로필은 **Project Guardian에 매핑된** 후에야 실제로 Guardian을 호출합니다([Guardian 등록](/ko/v1.2/admin/register-guardian) 시 또는 설정에서 수행). 그 전까지는 Guardian targets가 Opticon에 기록되기만 하고 평가되지는 않습니다.
 **기본 제공** 프로필(ChatGPT, Claude 등) 중 하나에서 시작하세요 — 처음부터 만들기보다 복제한 후 조정하세요. [AI 서비스 추가 / 변경 / 제거](/ko/v1.2/admin/how-to/manage-ai-services)를 참고하세요.