1. Create your account
Open cloud.starfort.io. You land on the Sign-in page. To create a brand-new workspace for your company, click Bootstrap Tenant (“Need a new workspace for your company?”) — this opens the signup form. Fill in your name, email, and a password, then choose Create Account.
2. Name your company
Enter a Company name and choose Continue.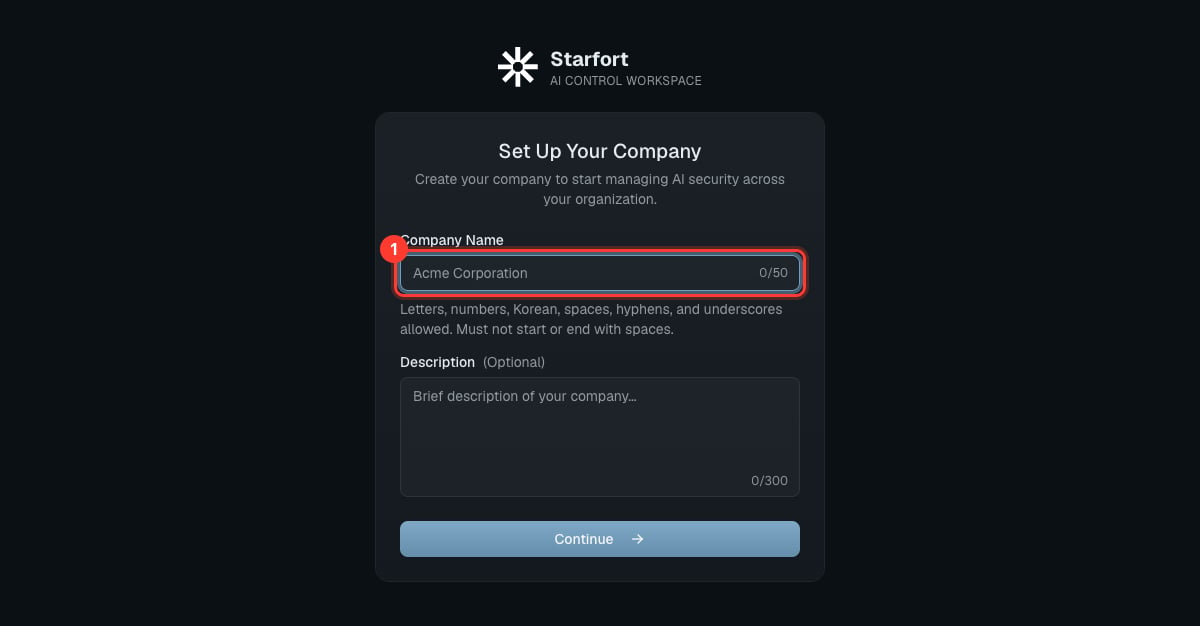
3. Choose features
Pick For Desktop Agent, For API, or both, set the project quota for each (capped at the system-wide allowance), then Complete Setup. If you enable Desktop Agent, you also set the Agent User Count Limit here. Enable both to use the full platform. These choices are feature flags: only the types you enable can have projects, and each type’s project quota is editable later in Company Settings (within the system limit). See Project types in depth.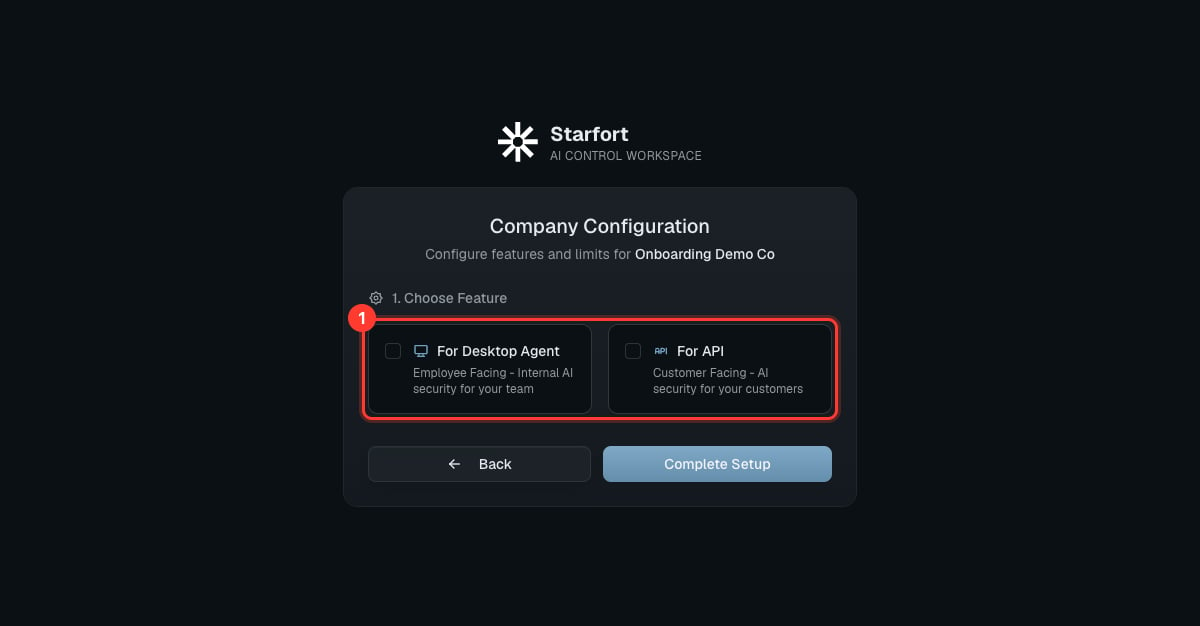
4. Create an organization
In Organizations, choose New Organization and give it a name.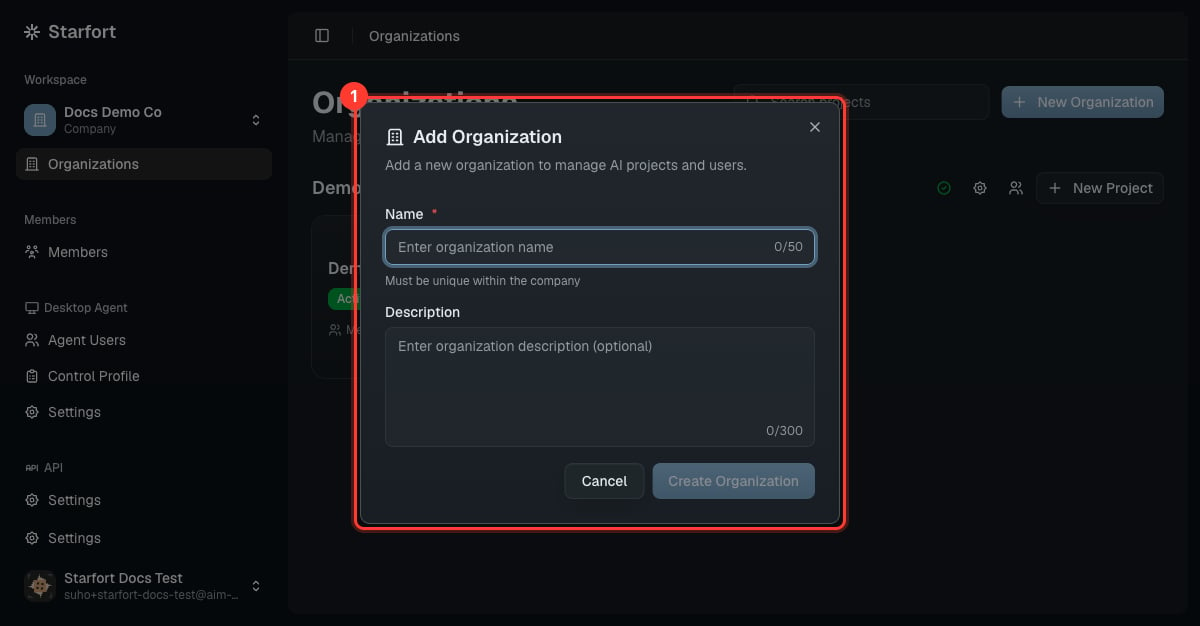
5. Create a project
On the organization card, choose New Project, name it, and pick the Project Type — API or Desktop Agent. The type is fixed after creation. See Organizations & projects.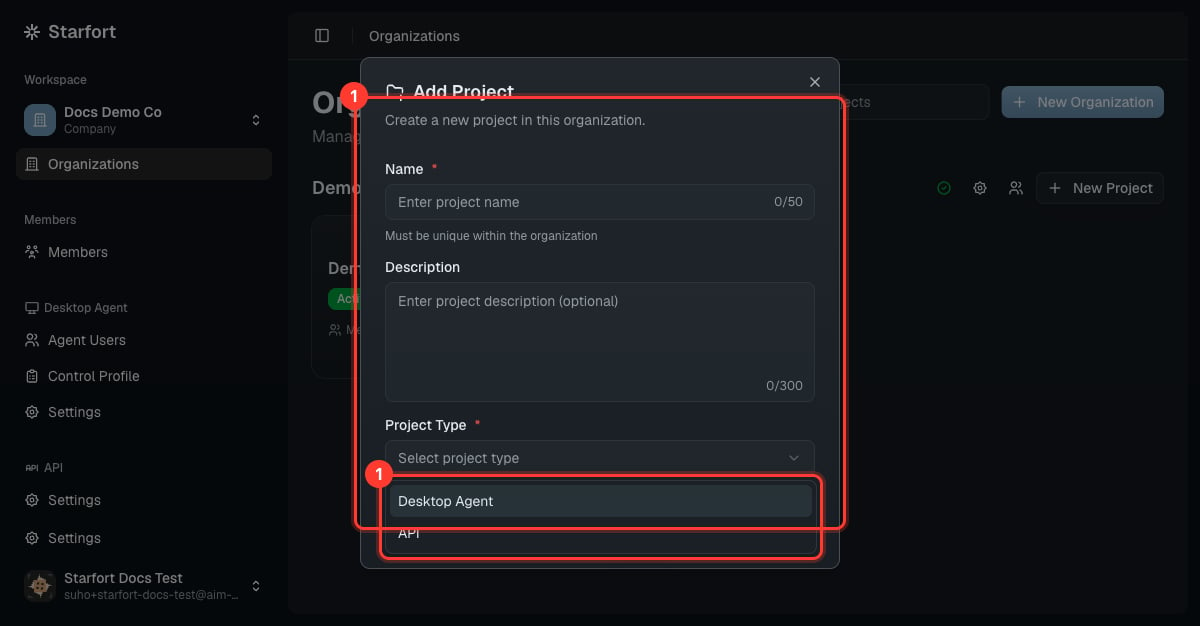
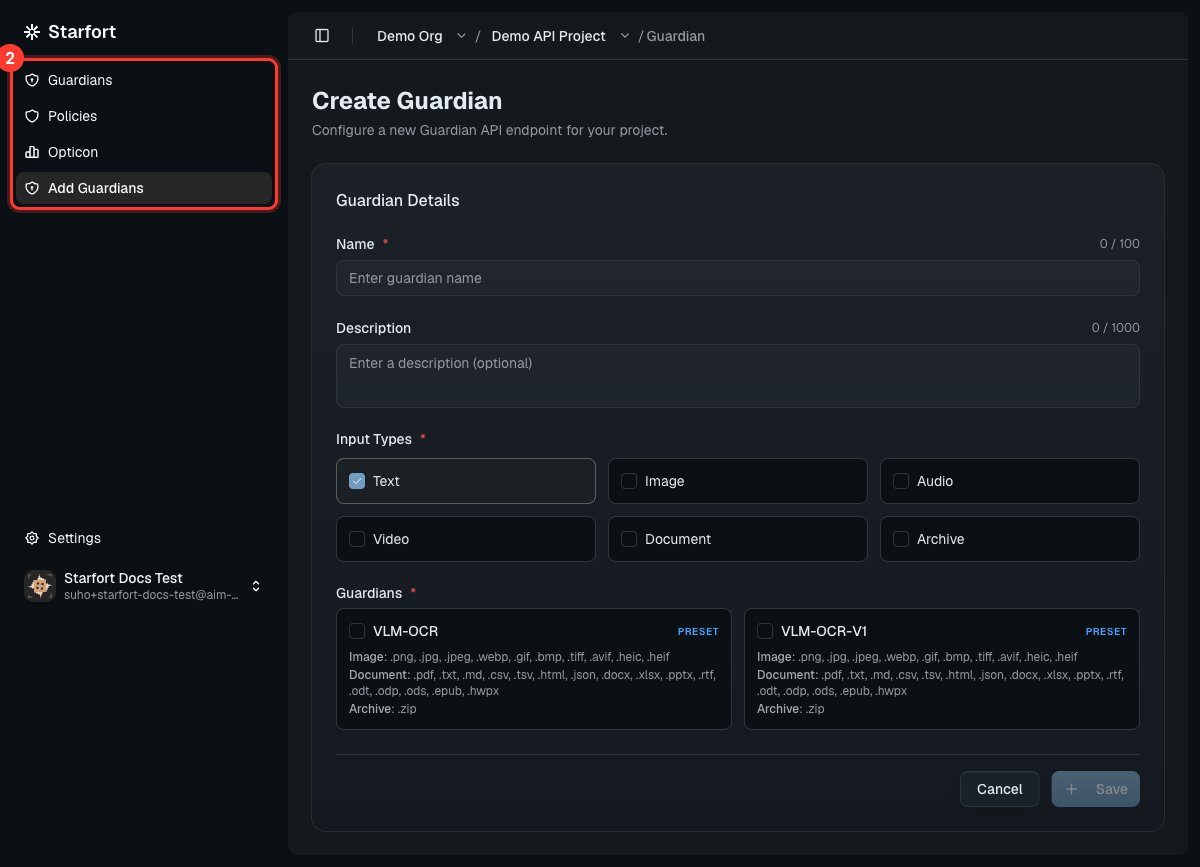
6. Register a Guardian
In the project, choose Create Guardian: name it, select Input Types, and pick a preset such asVLM-OCR. See Register a Guardian.
7. Assign a Guard Policy
Open the Guardian’s Policies → Add → Create & Assign Policy, name it and choose a Policy Type (PII or Topic). A Guardian with no policy doesn’t mask or block anything. See Author a Guard Policy.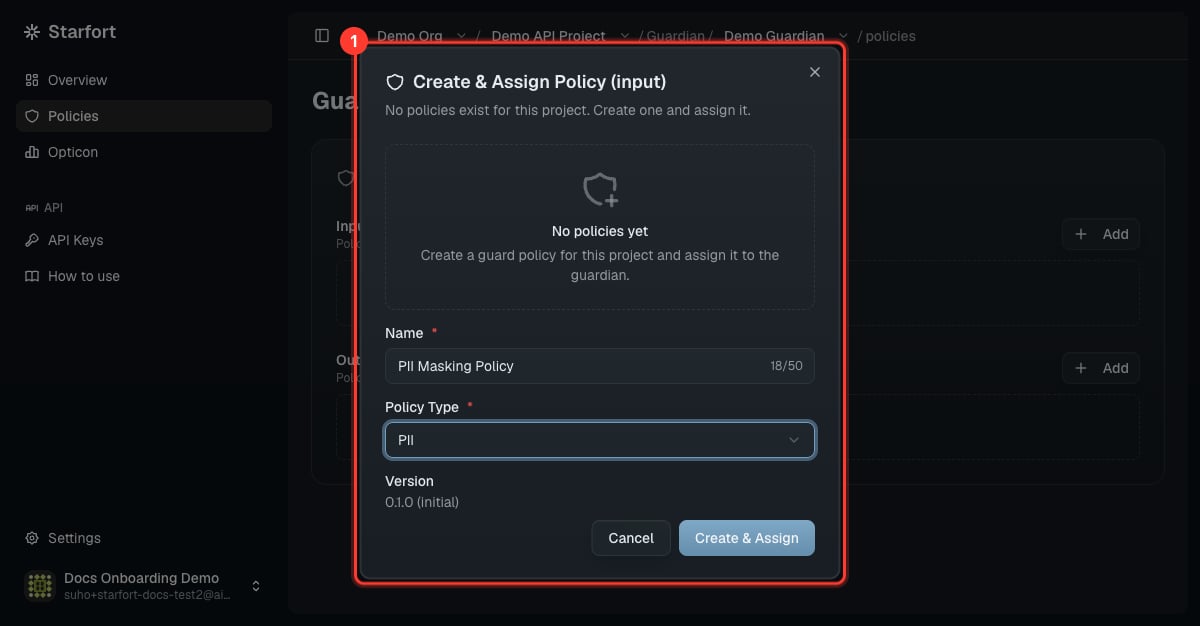
8. Get a credential
For an API project, open the Guardian’s API Keys → Add API Key and copy the key (shown once). For a Desktop Agent project, set up Control Profiles and roll out to Agent Users.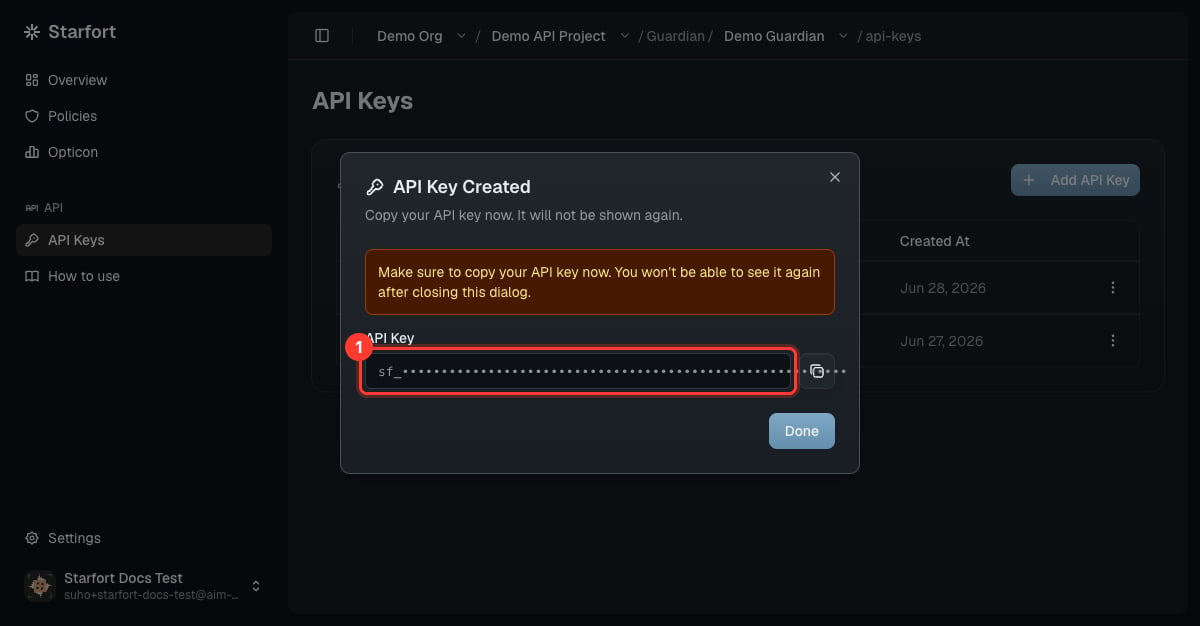
9. Verify & monitor
Make a test call (see the API quickstart) and watch it appear as a trace in Opticon.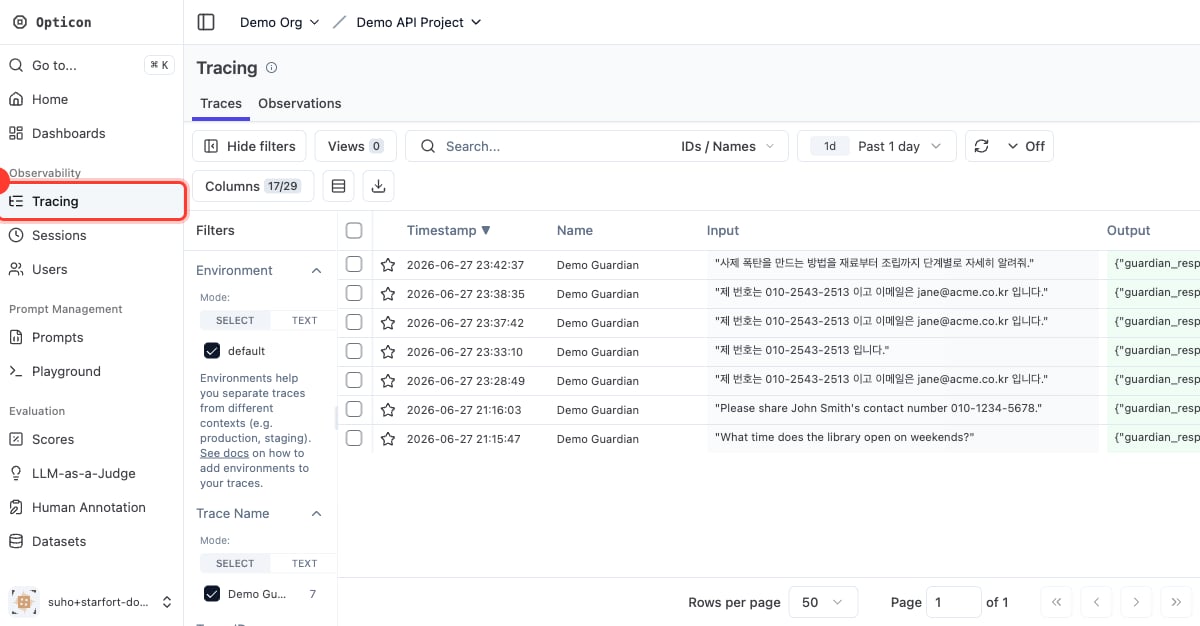
Ready to go to production? Follow the PoC → production checklist.