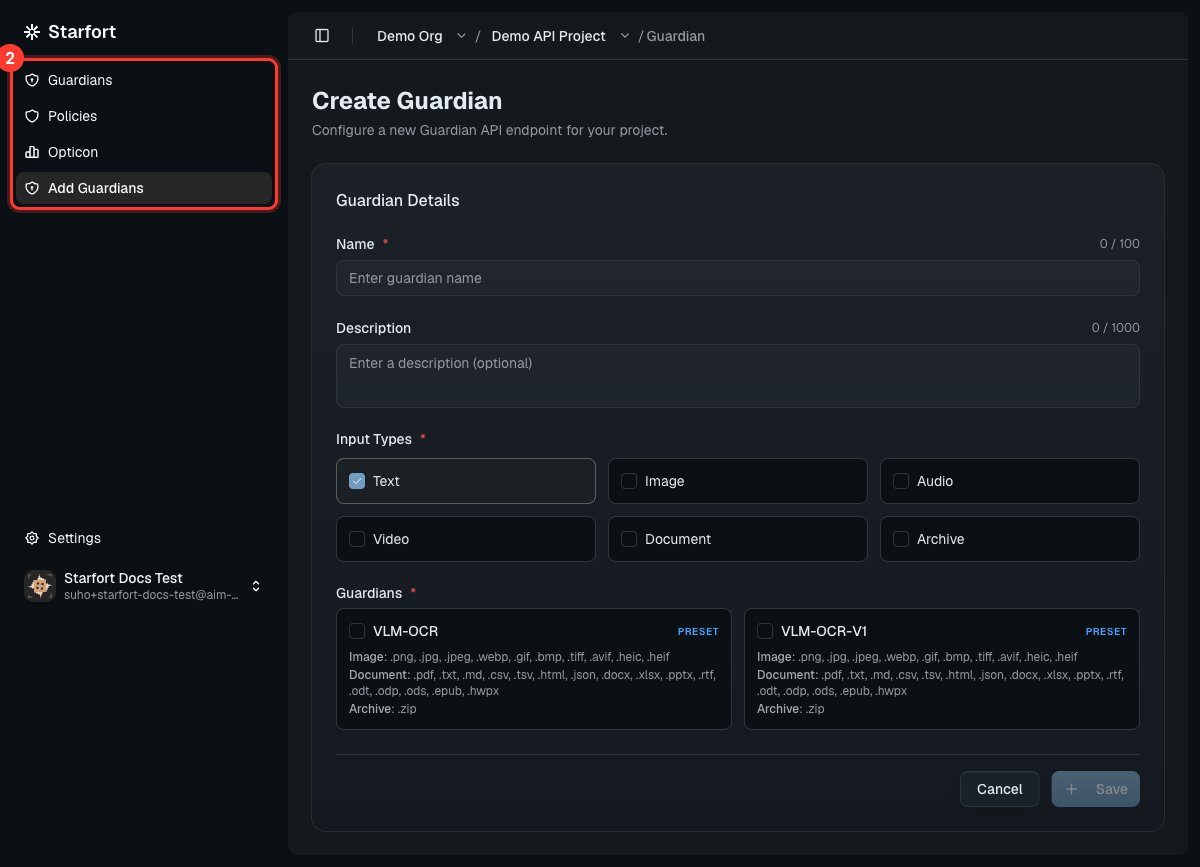
Create the Guardian
Registering one takes just four required fields — everything else is auto-filled from the chosen preset, and the Guardian is active immediately (no separate activation step). In the project, choose Create Guardian and fill in:Name & description
A name to identify this Guardian. The name must be unique within the project — it’s used as the trace name in Opticon.
Input Types
Enable the content kinds it will inspect — Text, Image, Audio, Video, Document, Archive (at least one).
Preset (Guardian)
After selecting Input Types, pick a preset such as VLM-OCR. Only presets that support all of your chosen Input Types are shown. In a Desktop Agent project, only Desktop-Agent-compatible presets appear.
After creation
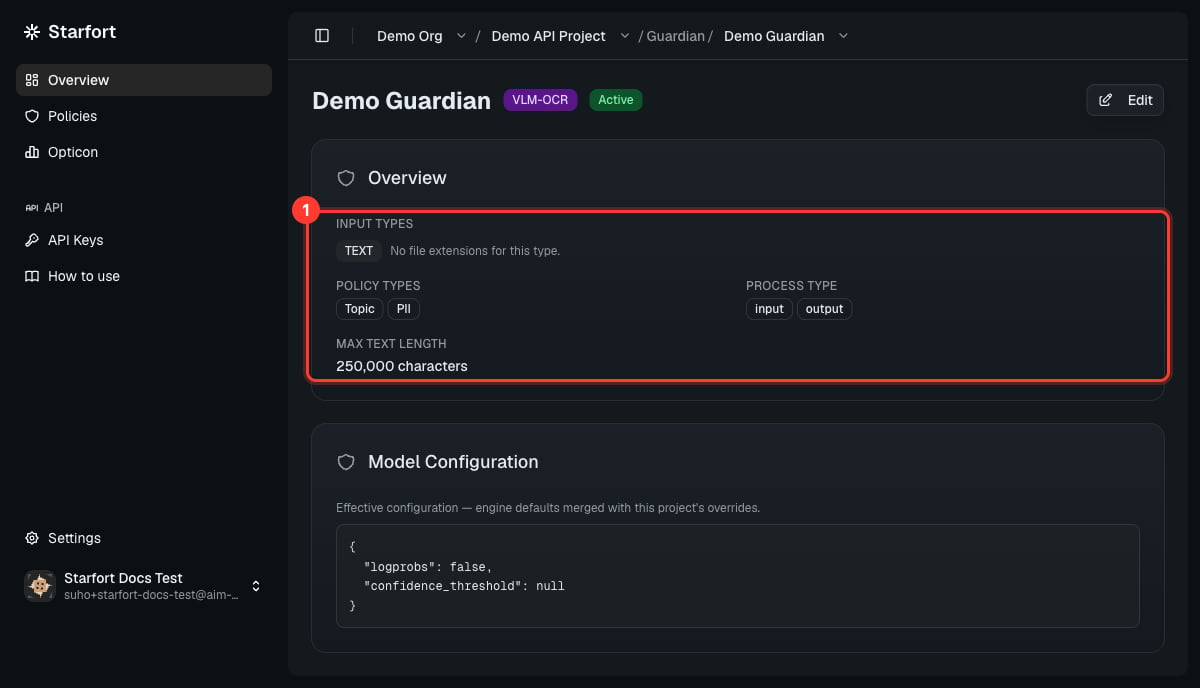
The Guardian’s Overview shows its Input Types, supported Policy Types (PII, Topic), process types (input, output), text-length and file-size limits, and Model Configuration.
The preset’s values are copied into the Guardian at creation — a snapshot you own. Later changes to the underlying preset don’t reach back into your Guardian (only its endpoint binding keeps tracking the live service). You can override the copied limits, supported extensions, and Model Configuration in the Guardian’s Settings within the preset’s range, but the set of supported Policy Types is inherited whole and isn’t editable here. Files in formats the Guardian doesn’t support are blocked by default (you can switch this to pass in Settings).
In a Desktop Agent project, the Guardian also has a Control Profile mapping step: pick which Dynamic Control Profiles this Guardian handles (each mapping has an on/off toggle, on by default). Unmapped targets are logged in Opticon but not sent to a Guardian.
A new Guardian has no policies yet — it won’t mask or block anything until you assign a Guard Policy.